BIM TECHNOLOGY: A PRACTICAL GUIDE FOR AEC PROFESSIONALS
The architecture and construction industries are changing fast. Clients expect speed, precision, and smart design. At the same time, project teams need better tools to manage growing complexity. Traditional 2D drawings and even 3D models are no longer enough.
This is where BIM technology comes in. It offers a new way to design, build, and manage buildings using intelligent 3D models linked to detailed project data. With BIM, teams can visualize structures, estimate costs, plan timelines, and coordinate tasks — all within one connected system.
Across the AEC industry, BIM is becoming the standard. Many countries now require it for public projects. Private firms use it to save time, cut costs, and avoid mistakes. Simply put, building information modeling helps professionals deliver better results at every stage — from planning to construction and beyond.
To help you understand how it works and how to use it, our CAD studio prepared this in-depth guide. It explains the basics of BIM technology, its benefits, how it compares to other tools, and what it takes to implement it successfully.
#1. Introduction to BIM Technology
 BIM technology has become a game-changer in the architecture and construction industries. It goes far beyond traditional drawing or 3D modeling. But what exactly is BIM, and why is it so important today?
1.1. What is BIM Technology?
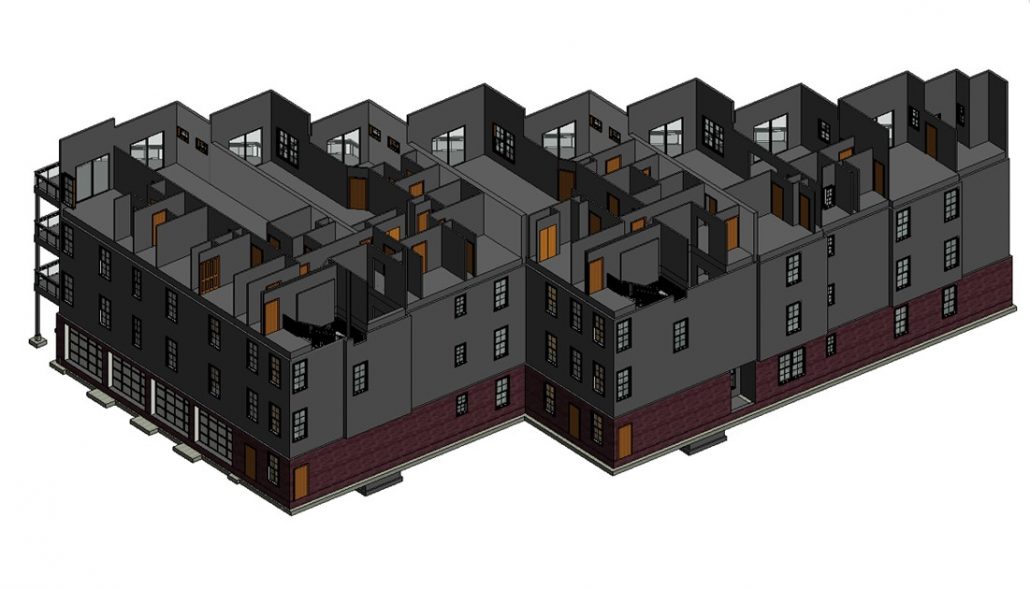
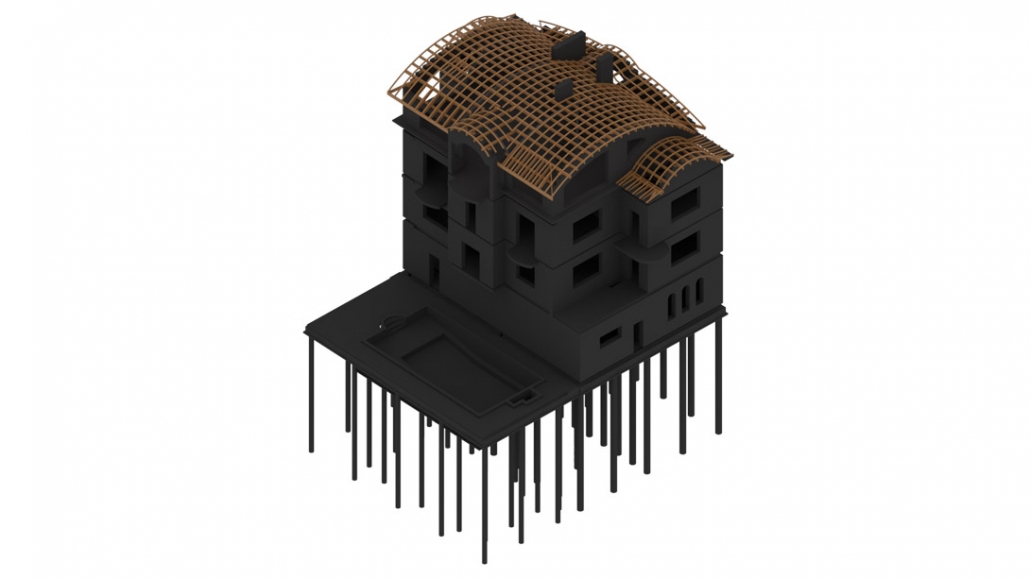
Building information modeling is a process that combines 3D design with smart project data. The result is a digital model that reflects the real building, including materials, systems, and technical details.
Every element in the model, from walls to mechanical systems, carries information. It’s not just about how things look but how they work. BIM connects geometry with data like cost, performance, and construction timing.
This approach helps teams work faster and smarter. It reduces errors, improves coordination, and supports better decisions. And all before construction even begins.
1.2. Why BIM Matters Today
Projects are getting bigger and more complex. At the same time, there’s pressure to deliver results faster and more efficiently. BIM technology helps teams handle these demands with clarity and control.
With BIM, everyone involved works from the same coordinated model. This improves communication, reduces confusion, and makes collaboration easier across all stages of the project.
It also replaces scattered drawings and disconnected files with a single, consistent source of data. That means fewer delays, better documentation, and more predictable outcomes.
In many countries, BIM is now required for public developments. It’s no longer an optional tool — it’s a new standard in the AEC industry.
BIM is viewed now as a complex virtual process that combines all aspects, disciplines, systems of an object within one virtual model. It enables all team members to perform more accurately and efficiently. In such an interpretation, BIM poses itself as the technology that first instructs about constructability – i.e. identifying if a certain design and its parts are buildable – and then helps construct it in the most thought-out way.
#2. BIM vs Other Technologies: Understanding the Differences
BIM technology is often mistaken for other digital tools like CAD or 3D modeling. They may seem similar at first, but they serve completely different purposes. This section explains how BIM compares to 2D drawing and 3D modeling and when it’s the better choice.
2.1. BIM Technology vs 2D Drawing
2D drawing is still widely used in architecture. It’s familiar, straightforward, and works well for small projects. Tools like AutoCAD help create floor plans, sections, and elevations quickly. But 2D drawings are static. Every view must be updated by hand, which increases the risk of errors.
BIM technology takes a different approach. Instead of disconnected drawings, you work with one dynamic model. When a change is made, all related views update automatically.
2D drawings can still be used for basic designs. But for larger or more complex projects, BIM offers more speed, control, and reliability.
2.2. BIM vs 3D Modeling
3D modeling is great for visualizing architectural ideas. It helps clients and stakeholders understand how a project might look when it’s built. Tools like 3ds Max or Rhino are often used to create realistic images and animations. But these models focus on appearance, not on construction details.
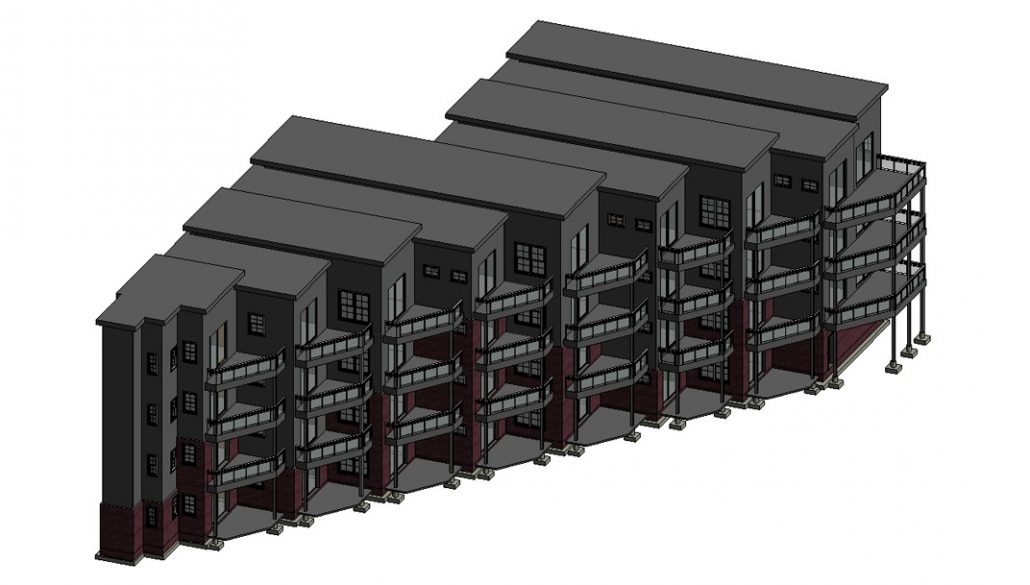
BIM technology goes much further. A BIM model isn’t just a 3D shape. It includes real data about materials, structure, building systems, and timelines. Each element is part of a working system that can be tested and optimized.
3D modeling is ideal for design presentations. But when it comes to construction planning, cost estimation, and long-term operations, BIM is the more practical and powerful tool.
BIM services are not just about software – it’s the combo of software and process. It means not just creating 3D models but making modifications in the workflow and project delivery operations. Thus, BIM implies that all the stakeholders are involved in the process. This contributes to greater efficiency and work coordination between participants who, back in the past, played as adversaries. Moreover, BIM embraces an integrated project delivery, a brand new approach to incorporate people, methodology, and business structures and practices into a collective process. The purpose of such endeavors is simple – to increase efficiency throughout the whole project life cycle.
Want to know more about CAD services our studio provides? Check out this archive with projects examples and learn more.
#3. How BIM Technology Works
To understand the power of BIM technology, it helps to see how it functions. At its core, BIM is more than just a 3D model. It’s a smart system that connects design elements with data. This allows teams to simulate, coordinate, and manage every part of a building project. Let’s look at what makes BIM so effective.
3.1. Multidimensional Capabilities of BIM
One of the major strengths of BIM technology is that it goes beyond basic geometry. Each added dimension gives teams more control and insight.
- 3D – Visual Representation. The model shows the full shape of the building — walls, windows, roofs, and MEP systems. But each element is intelligent, meaning it carries data and knows how it connects to the rest.
- 4D – Time and Scheduling. Construction phases are linked to model components. Teams can visualize progress, spot delays, and plan sequencing before work begins.
- 5D – Cost Estimation and Budgeting. The model updates costs automatically when design choices are made. It factors in quantities, labor, and materials to support accurate budgeting.
- 6D – Facility Operation and Maintenance. After construction, the BIM model helps manage the building. It stores info like install dates, maintenance schedules, and manufacturer details.
- 7D – Sustainability and Energy Performance. Teams can run energy simulations and analyze insulation, lighting, and HVAC impact. This helps improve long-term performance and reduce waste.
- 8D – Safety and Risk Management. The model highlights risk zones and helps plan safer construction workflows. This supports compliance and reduces site accidents.
Each dimension adds more value, helping teams make better decisions throughout the entire building lifecycle.
3.2. Object-based modeling and automation
In BIM technology, models are made from smart objects, not just lines or shapes. These objects include everything from walls and doors to light fixtures, HVAC units, and even furniture.
Each one carries detailed data. A wall, for example, knows its height, material, and fire rating. These objects also update automatically across views. Change a window, and it adjusts in the floor plan, elevation, and schedule.
BIM also supports custom libraries. Teams can reuse elements across projects, saving time and maintaining accuracy. With object-based modeling, BIM improves consistency and reduces manual work.
3.3. Real-World Simulation and Sustainability
One of the key strengths of BIM technology is its ability to simulate how a building will perform in real life. Before anything is built, project teams can test how systems will function, how materials will behave, and how the structure will respond to different conditions.
For example, BIM can simulate:
- Energy efficiency — to see how insulation and HVAC choices affect energy use.
- Lighting and daylighting — to analyze natural light throughout the day and year.
- Thermal performance — to predict how well the building will retain or release heat.
These simulations help improve sustainability and reduce operational costs. Teams can compare options, identify weak points, and make smarter design choices early on. By integrating real-world analysis into the design phase, BIM supports greener, more efficient, and more resilient buildings from the start.
#4. Key Benefits of BIM for AEC Professionals
BIM technology is a solution that improves the way professionals work across architecture, engineering, and construction. From higher accuracy to smoother collaboration, BIM offers advantages at every stage of the project. In this section, we’ll look at how it helps teams work better, faster, and with fewer risks.
4.1. Accurate and Intelligent Design
BIM models contain much more than geometry. They include detailed data about materials, structural loads, mechanical systems, and more. This makes it easier to spot issues early and ensure that the design can actually be built.
With building information modeling, everything is connected. A single change in the model updates across all views. This improves accuracy, saves time, and reduces human error, especially on large or complex projects.
4.2. Enhanced Collaboration and Communication
BIM technology improves how teams work together. Everyone involved — architects, engineers, contractors, and clients — can access and work on the same model. This keeps communications clear and reduces the risk of misunderstandings.
Changes made in the model are visible in real time, so all team members stay updated. Cloud platforms like BIM 360 allow for smooth coordination, even when people are working remotely or on-site.
By keeping everyone on the same page, BIM helps avoid delays, rework, and costly miscommunications during the project.
4.3. Risk Mitigation and Workflow Optimization
BIM technology helps teams spot and solve problems before they happen. Built-in tools detect clashes between systems, like plumbing and electrical, during the design stage. Fixing issues early means fewer delays and unexpected costs during construction.
The workflow in BIM is also more efficient. Teams can automate schedules, material takeoffs, and quantity estimates. This speeds up planning and reduces the chance of human error.
By improving both planning and execution, BIM makes projects more predictable — and much easier to manage from start to finish.
4.4. Data-Driven Project Lifecycle Management
One of the most powerful aspects of BIM technology is that it supports the entire lifecycle of a building — not just the design and construction phases. The same model used during planning becomes a valuable resource long after the project is complete.
Every object in a BIM model can store data like manufacturer details, installation dates, warranty info, and maintenance schedules. This helps building owners and facility managers make informed decisions about repairs, upgrades, and daily operations.
For example, if an HVAC system needs servicing, the team can quickly check the model for exact specifications and history — no need to dig through paperwork or guess. Over time, this improves efficiency, reduces operating costs, and extends the life of the building.
BIM ensures that the information created during design and construction stays useful for years to come.
#5. Step-by-Step: How a BIM Project is Done
Creating a BIM model is more than just building a 3D structure. It’s a step-by-step process that blends design, data, and coordination. Here’s how our CAD studio handles a BIM technology project from start to finish.
5.1. Get the Brief
Every project starts with a detailed brief. Clients provide materials like 2D plans, sketches, specifications, and references. The more complete the input, the smoother the process.
At this stage, we clarify expectations, define goals, and discuss any unique project requirements. Communication tools, like CRM systems or shared platforms, help track feedback, manage files, and ensure nothing gets missed. This early phase sets the foundation for an efficient and accurate BIM workflow.
5.2. Import and Prepare 2D Drawings
Once the brief is confirmed, the next step is to import the provided 2D drawings into BIM software. These plans form the base of the model, so accuracy at this stage is critical.
CAD specialists carefully check file formats, scale settings, and drawing quality. Even if the software is compatible, things like line weights, dimensions, or annotation layers often need cleaning up.
5.3. Build a Structural Framework
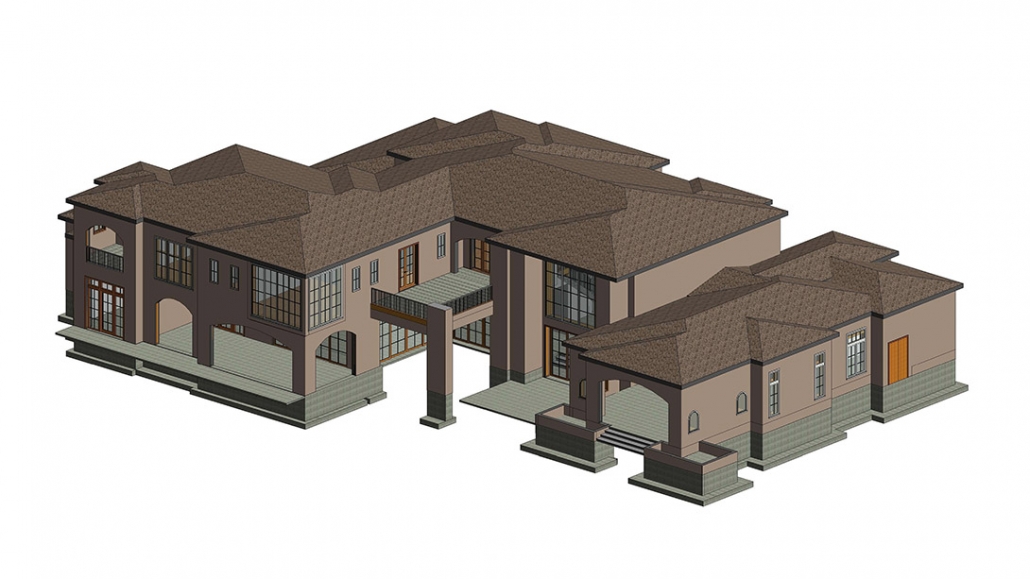
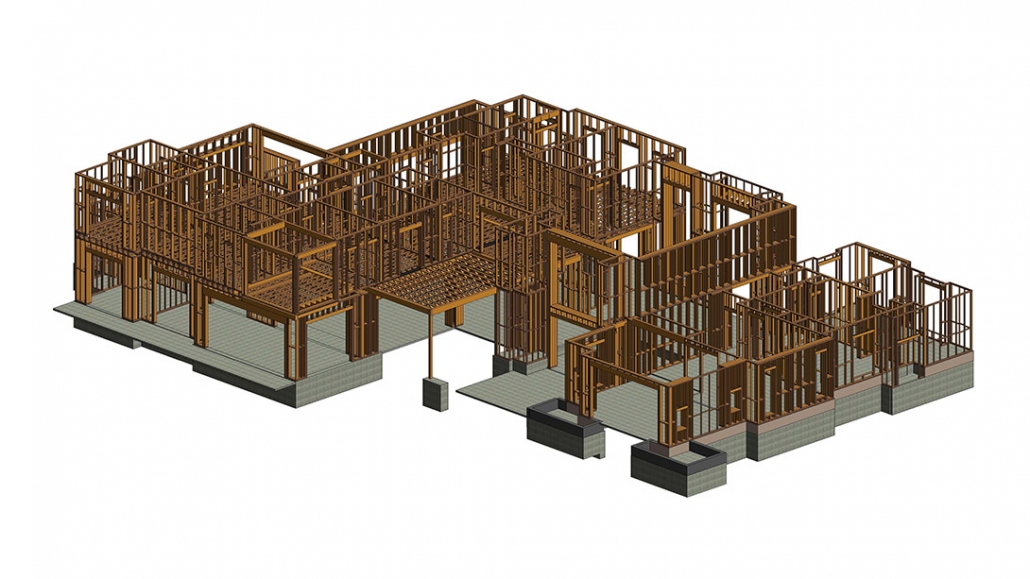
With the cleaned-up drawings in place, the modeling begins. CAD specialists use the 2D plans to create the main structure of the building — including walls, columns, floors, ceilings, and roofs.
This stage focuses on accuracy and stability. The team considers things like foundation load, wall connections, and overall geometry.
BIM software also runs checks for structural logic. If something doesn’t align or support loads correctly, it flags the issue early. This helps avoid problems later in the construction phase.
5.4. Add Architectural and Design Elements
Once the core structure is set, architectural details are added. This includes doors, windows, staircases, railings, beams, and other design elements.
Most BIM software comes with built-in libraries or standard components — grouped into what are called “families”. These can be replaced and customized early. If a project requires something unique, custom elements can be modelled from scratch.
5.5. Select Materials and Textures
Materials are then applied to the entire model. These aren’t just for visual effect. They carry information about cost, durability, energy performance, and more.
Custom textures or finishes can be created when needed, especially for high-end projects or client presentations. By combining realistic visuals with material data, BIM technology supports both creative decisions and practical planning.
5.6. Create the Environment
A building doesn’t exist in isolation. That’s why the surroundings matter. In this step, CAD specialists add site elements like driveways, sidewalks, trees, fences, water features, and lighting.
The goal is to show how the structure fits into its environment. This helps clients and stakeholders better understand the full context of the design.
Sun positions, shadows, and sky settings can also be adjusted. This adds realism and helps with solar studies and landscape planning.
5.7. Rendering and Post-Production
The final step is rendering. Cameras are placed inside and around the building to capture the best angles and views.
High-resolution images are produced for presentations, while simpler drafts can be used for internal review. Post-production tools are used to enhance lighting, colors, and clarity. As a result, the visuals are both polished and technically accurate.
Thanks to BIM technology, these visuals are based on real design and construction data — not just artistic interpretation. This makes them not only attractive but also accurate and trustworthy.
#6. Choosing the Right BIM Software

There is no one-size-fits-all solution when it comes to BIM tools. Different teams have different needs — whether it’s advanced modeling, collaboration features, or cost estimation. In this section, we’ll go over some of the most widely used BIM software options and explain what makes each one unique. Choosing the right platform is a key step in getting the most out of BIM technology.
6.1. Overview of Top BIM Tools
Here are some of the most popular BIM platforms used in architecture and construction today:
- Revit. One of the most well-known BIM tools, ideal for detailed architectural and engineering models. It supports collaboration, automatic documentation, and cost tracking — all in one platform.
- BIM 360. A cloud-based solution focused on teamwork. It’s great for connecting fields and office teams, tracking updates in real time, and managing files from any device.
- ArchiCAD. Known for its user-friendly interface and smooth 2D/3D workflow. It’s widely used by architects who want speed and simplicity without sacrificing model detail.
- PriMus IFC. Specialized in quantity takeoff and cost estimating. It extracts data directly from BIM models and helps project managers control budgets and create bills of quantities.
- AECOsim BD. A powerful tool for complex infrastructure and MEP systems. It includes advanced simulation features like energy analysis and system performance checks.
- VisualARQ. A plugin for Rhino that adds BIM features like parametric objects and IFC support. It’s perfect for teams who work in Rhino and want to keep their workflow flexible.
- BIMx. A presentation tool that makes it easy to explore BIM models on mobile devices. Great for client meetings and stakeholder walkthroughs.
Each of these tools supports different aspects of BIM, so the best choice depends on your team’s needs, project scope, and workflow.
6.2. Choosing Based on Needs
Not every project requires the same BIM features. Some tools are better for design-heavy workflows, while others focus on budgeting, collaboration, or site coordinations. The key is to match the software to the tasks at hand.
If your team works on large, multidisciplinary projects, platforms like Revit or BIM 360 offer strong coordination and automation tools. For quick concept development or smaller-scale jobs, ArchiCAD or VisualARQ may be more efficient.
It’s also important to consider:
- Team size and roles — Choose tools that support collaboration without overcomplicating the workflow.
- Budget and licensing — Look at subscription models, one-time licenses, and trial options.
- Software compatibility — Ensure your BIM platform supports key formats like .IFC and integrates with your existing tools.
In the end, the best software is the one that fits how your team works. With the right setup, you’ll get more value out of BIM technology and improve every stage of the project.
#7. When and Why to Outsource BIM Services
While some firms have in-house BIM specialists, many choose to outsource. This approach offers flexibility, saves time, and gives access to experienced professionals without needing to build a full internal team. In this section, we’ll explore when outsourcing makes sense and what to look for in a reliable partner. For many, it’s the smartest way to benefit from BIM technology without slowing down operations.
7.1. Why Outsourcing Works
Outsourcing BIM lets your team focus on core responsibilities while specialists handle the technical modeling. It is especially useful when:
- You are on a tight deadline and need extra support.
- The project requires advanced BIM skills that your team doesn’t yet have.
- You want to test BIM workflows without committing to long-term hiring or training.
Working with a dedicated BIM team means faster turnaround, better consistency, and fewer errors. You also gain access to tools, templates, and workflows developed over years of experience.
With the right partner, BIM becomes easier to implement and more effective from day one.
7.2. What to Look for in a BIM Partner
Not all BIM providers offer the same level of quality. To get the best results, it’s important to work with a team that understands both the technical side of BIM technology and the real-world needs of architecture and construction.
Here are a few key things to consider:
- Clear communication — Look for a studio that uses CRM systems or collaboration platforms to keep projects organized and easy to track.
- Proven experience — Ask for portfolio examples or case studies, especially for projects similar to yours.
- Attention to detail — A strong BIM partner will double-check geometry, data accuracy, and file compatibility to avoid costly mistakes later.
- Flexibility — The ability to adapt to your workflow, timelines, and file standards makes collaboration smoother.
When you choose the right partner, you get more than a service. You gain a reliable extension of your team. With expert support, your BIM process becomes faster, more efficient, and easier to scale.
Wonder how much high-quality drafting services cost? Check out the examples of our real projects with pricing.
BIM technology is changing the way buildings are designed, built, and managed. It replaces fragmented workflows with a connected, intelligent process — one that supports better decisions from concept to construction and beyond. With BIM, teams can work faster, avoid costly mistakes, and stay aligned at every stage. Whether it’s planning, budgeting, collaboration, or facility management, this technology brings clarity and structure to even the most complex projects.
Looking for a more efficient way to manage your design and construction process? Use our BIM services to get precise models that support every stage of your project.





Leave a Reply
Want to join the discussion?Feel free to contribute!