

POINT CLOUD TO BIM: THE SCAN TO BIM PROCESS, LOD AND COST
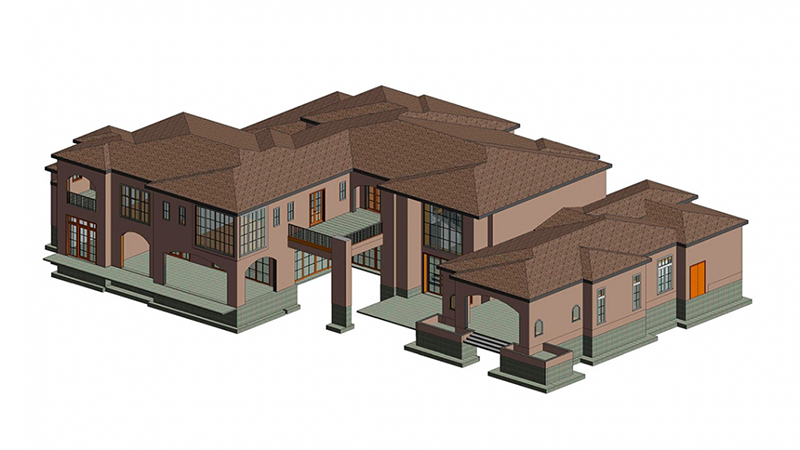
A renovation starts backwards. The building is standing right there, and the drawings either do not exist or date from 1978 and lie about where the walls are.
Scanning solves half of that. It gives you millions of measured points and no idea what any of them mean. Turning those points into a model somebody can build from is the other half, and it is a person doing the work, not a button.
Contents:
- What a point cloud is, and what it is not
- How the scan gets made
- Point cloud modeling: where the hours go
- The scan to BIM process, step by step
- LOD and tolerance decide the price
- What you get at the end
- Where architects actually use it
- When scanning is not the answer
- Point cloud to BIM FAQ
What a Point Cloud Is, and What It Is Not
A point cloud is a list of coordinates. Each point has an X, a Y, a Z, usually a colour value, and nothing else. Put fifty million of them together and a room appears on screen.
What is missing is meaning. The cloud does not know a wall from a bookshelf, it has no idea where a room begins, and nothing in it can be scheduled or dimensioned automatically. Software will not tell you the ceiling height. It will only show you points that happen to sit at the ceiling.
Files arrive as E57 if the surveyor is being neutral about it, RCP and RCS if the project runs on Autodesk, sometimes LAS or PTS. Sizes get silly fast. A mid-size office floor scanned properly is tens of gigabytes, which is worth knowing before somebody tries to email it.
The model built from that cloud is a different animal. It has walls that know their type, floors with levels, doors that count themselves in a schedule. That is the jump people are actually paying for, and it is why the wider BIM method matters more than the scan itself.
How the Scan Gets Made
Three methods, and they are not interchangeable.
A terrestrial laser scanner sits on a tripod and spins. It is the accurate one, millimetres rather than centimetres, and it is slow. Every position it cannot see from becomes a hole in the data, so a floor takes a dozen setups or more.
A drone with a camera covers roofs, facades and site topography that no tripod will reach. Photogrammetry rather than laser, so accuracy depends on flight height and overlap. Good for the outside, weak indoors.
Handheld and backpack scanners walk through a building and stitch as they go. Fast, forgiving, less precise. Fine for a layout survey, not for anything where 20 mm changes the answer.
Whichever gets used, the separate scans have to be registered into one coordinate system before modeling starts. Ask for the registration report. If the survey came back with a 30 mm error between stations, no amount of careful modeling afterwards will fix it.
Point Cloud Modeling: Where the Hours Go
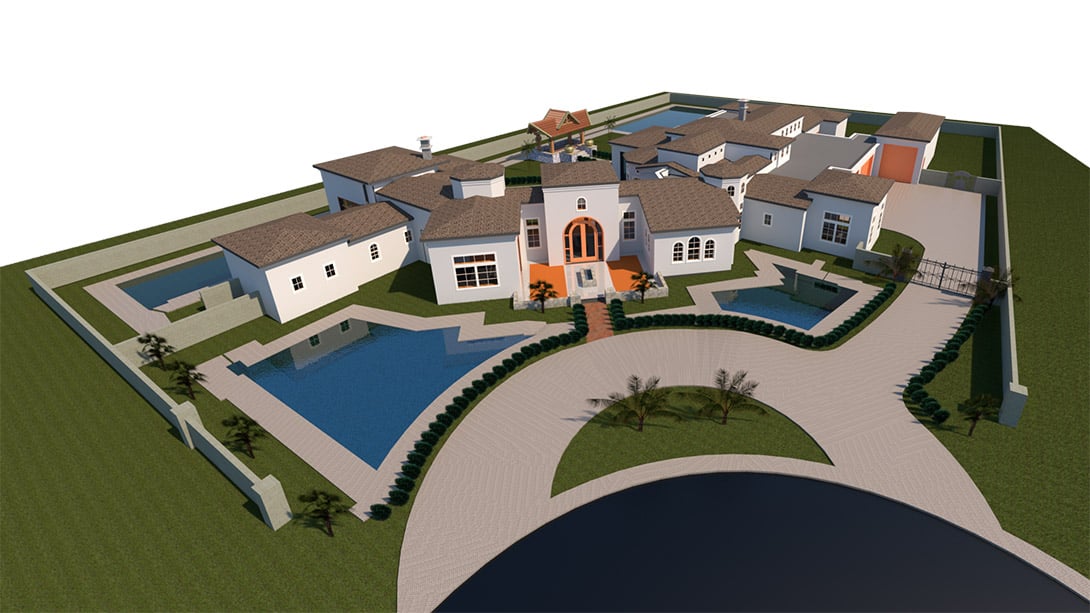
This is the part clients underestimate, so it is worth being blunt about it.
Somebody opens the cloud, slices a horizontal section through it, and traces walls onto the noise. Then a vertical slice for heights. Then the same again for the next floor. Real buildings are not square, so every wall involves a judgement call: is this face bowing by 40 mm because the building settled, or because a radiator was in the way of the scanner?
Point cloud modeling for construction throws in more of that. Pipework and ducting hide above ceilings that were only half visible. Structure is behind finishes. Whatever was not scanned has to be inferred, flagged, or left out, and the three options cost very different amounts.
Automated tools exist and they help with floors, ceilings and obvious straight walls. They fall apart on curves, on anything historic, and on any building where two eras of construction meet. Nobody delivers a usable model straight out of an algorithm.
Want to know more about CAD services our studio provides? Check out this archive with projects examples and learn more.
The Scan to BIM Process, Step by Step
A project that runs cleanly looks like this.
- Say what the model is for. A feasibility study, a permit set and a fabrication model are three different jobs. Naming the purpose first is what stops the scope drifting later
- Agree LOD and tolerance in writing. More on that below, and it belongs in the order, not in an email three weeks in
- Check the registration. The modeler opens the cloud, looks for gaps and drift, and says so before starting rather than after
- Model the structure. Levels, grids, walls, floors, roofs, columns. Everything else hangs off this
- Model the rest. Openings, stairs, then services if they were part of the order
- Check the model against the cloud. A proper QA pass overlays the two and hunts for deviation. This is the step that gets skipped by cheap suppliers
- Deliver, then hold a review. The first look almost always produces two or three corrections, which is normal and should already be included
Timeline for a straightforward building runs one to three weeks after the cloud lands. The general shape of it matches any drafting job, which we set out in the CAD drafting process.
LOD and Tolerance Decide the Price
Two numbers control the invoice, and clients rarely name either one.
Level of development. LOD 200 is generic: correct sizes and positions, no detail. LOD 300 covers most renovation and permit work, with real assemblies and coordinated elements. LOD 350 adds the connections between systems. LOD 400 is fabrication grade and belongs in shop drawings, not in a survey model.
Ordering LOD 400 for a feasibility study burns money. Ordering LOD 200 and expecting to build from it burns a month.
Tolerance. How far the model is allowed to sit from the cloud, usually 10 to 25 mm. The other half of the question is what happens when reality misbehaves. A wall that leans 60 mm over its height can be modeled leaning, which is honest and awkward to work with, or modeled straight with a note. Decide which before anyone starts, because redoing it later is a redraw.
What You Get at the End
Ask for the list up front. Otherwise an RVT file turns up and nobody can do anything with it.
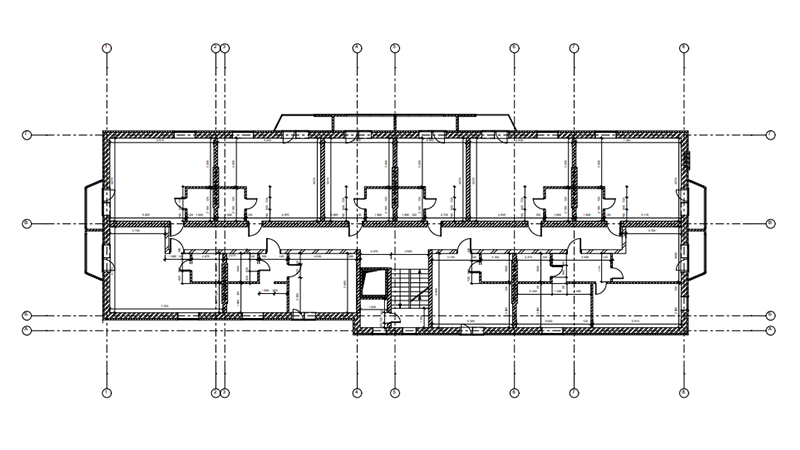
The native model, obviously. Sheets set up and ready to print, since the plans and sections above come out of the model rather than being drawn again. Schedules for whatever the project counts. An IFC export for consultants on other software, and NWC if the job goes through Navisworks for clash detection. The file formats guide covers what each one keeps and what it drops.
Most projects also want 2D as-built drawings out of it, which is the record of the building as it actually stands today rather than as somebody once intended it.
Where Architects Actually Use It
Renovation is the obvious one, and the most common. You cannot design into a building you have not measured, and a scan removes the eight site visits that a tape measure would need.
Coordination is the expensive one to skip. Existing services modeled properly means the new duct route gets checked against the real ceiling void instead of an assumption, months before anyone is on site with an angle grinder.
Heritage work leans on it hardest. Mouldings, columns, damaged stonework: the scan records the profile precisely enough to reproduce a missing piece, and the model becomes the permanent record if the original is lost.
Demolition planning uses the same data in reverse. When half a structure comes down and the rest stays, knowing where the utilities run is not a nice extra.
And presentations benefit, though this is the smallest of the reasons. A model of the existing building sitting next to the proposal explains a scheme faster than any amount of talking.
When Scanning Is Not the Answer
Scanning a single small room is overkill. A tape measure and an hour will do, and the survey fee alone exceeds the value.
More usefully: if you already hold 2D DWG documentation and it is broadly reliable, you do not need a scanner at all. CAD to BIM conversion turns those flat drawings into a parametric model, with walls, floors and families instead of lines. Cheaper than a survey, and it only works if the drawings tell the truth. Spot-check a few dimensions on site first.
Our Revit modeling services cover both routes at $25 per hour. Send the cloud or the DWG set, and a project manager comes back with an hour estimate before anything starts. NDA first, and the first two rounds of revisions are included.
Wonder how much high-quality drafting services cost? Check out the examples of our real projects with pricing.
Point Cloud to BIM FAQ
What is point cloud to BIM?
It is the conversion of a laser scan into an intelligent 3D model. The scan gives you raw coordinates. The conversion gives you walls, floors, openings and structure that Revit can schedule and dimension. Also called scan to BIM, and the two terms mean the same job.
How accurate is a scan to BIM model?
As accurate as you specify, within reason. Typical tolerance is 10 to 25 mm against the cloud, and the survey itself sets the ceiling on that. A registration error of 30 mm cannot be modeled away. Agree the number in writing, along with how leaning and bowing walls should be handled.
How much does point cloud to BIM cost?
We work at $25 an hour rather than per square metre, because two buildings of the same size can differ by a factor of three. A clean modern office goes quickly. A 19th century building with vaults and three rounds of alteration does not. Send the cloud and get an hour estimate before committing.
How long does point cloud to BIM take?
One to three weeks for a straightforward building once the cloud arrives. Large or complicated sites run longer, and the honest answer depends on LOD more than on floor area. Ask for a staged delivery if a deadline is tight, structure first and services after.
What point cloud formats do you accept?
E57, RCP and RCS, LAS, LAZ, PTS, XYZ. If your surveyor uses something else, send a sample file and we will check it. Tell us the units and the coordinate system too, because guessing those wastes a day.
Do you do the scanning as well?
No, we model. Surveying is a separate trade and it is local by nature, so you hire a scanning company near the building. We are happy to tell your surveyor what coverage and density the model will need, which is worth doing before they turn up rather than after.

Ana Wayne
Content Writer, Copywriter
Ana is a content writer for ArchiCGI. She has a passion for design and architecture - and for talking about it. Outside of work, she is a fan of sci-fi movies and a street food connoisseur.


Leave a Reply
Want to join the discussion?Feel free to contribute!